
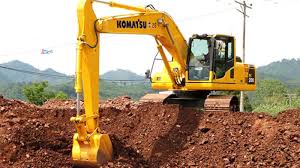
Komatsu excavator throttle problem is a common problem of all type of komatsu excavators. If you are facing throttle getting open or jammed then this is the best post for you. We are providing the solution of this problem at one place. Read this article carefully and find the solution to komatsu excavator throttle problems.
Check the komatsu excavator fuel control linkage or solenoid wiring
A lot of people don’t know that the fuel control linkage and solenoid wiring, in addition to the engine control unit (ECU), are important parts that have to be maintained by a qualified mechanic. If they fail, the excavator will stop working even if the engine is still running.
The fuel control linkage transmits signals from the ECU to the fuel pump to regulate fuel flow. The ECU has many sensors that check for wear, mechanical functions and other things, so it is important to maintain them.
Solenoids are also called actuators. They are like a switch that activates or deactivates different parts in an excavator and can also enable functions such as steering, digging or digging sand and gravel. A good mechanic should check these parts routinely.

Change the komatsu excavator engine oil and filter
1.Park the machine on a level surface and start the engine. Allow it to warm for about 10 minutes.
2. Press the “Stop” button to shut down the engine once it is warmed up.
3.Locate the engine oil drain plug underneath the machine, usually located on the bottom of the oil pan. Place a drain pan directly under this location and remove the plug with a wrench.
4.Allow all of the oil to drain out of the engine before replacing the plug and tightening it with a wrench.
5.Remove the old oil filter from its mounting point using an oil filter wrench or screwdriver. Clean any remaining residue from its mounting point with a rag, then place some clean motor oil on a rag and wipe off any excess dirt or grime from around where it was mounted.
6.Position your new filter in place and screw it in by hand until tight, then turn it another half-turn to ensure that it is seated properly in place.
7 .Open your new motor oil container and pour in enough new motor oil to fill up your engine’s sump back up to its full line on its dipstick
Check for komatsu excavator leaks in the fuel line
For the sake of safety, first apply the hand brake on the komatsu excavator, turn off the engine and wait for 10 minutes to make sure there is no residual pressure in the fuel system.
After that, remove the cap of the fuel tank and check whether there are impurities in the oil. If you find impurities, please clean them up. It should be noted that when cleaning up impurities, you cannot use a metal wire or other hard objects to avoid damaging parts of komatsu excavators.
Check if there is any leakage at several joints of the fuel line and whether there is any damage to the fuel pipe. If it leaks, please repair or replace it in time.
If there is no problem with the above inspections, start your komatsu excavator and accelerate to a high speed for about two minutes. Stop for 5 minutes and then check if there is any leakage at several joints of the fuel line again.
Clean the komatsu excavator air filter
Air filter is an important part of the excavator, and it is also a vulnerable part. For the maintenance personnel of the excavator, it is necessary to clean up the komatsu excavator air filter. If it is not cleaned up, it will cause various problems for the excavator. In order to make the air filter run well, the following points need attention:
1. Air filter should be cleaned before each use.
2. The cleaning method is as follows: first put the air filter into a bucket with diesel fuel or gasoline with a strong dissolving power, then use a brush to clean up, and then rinse with water, repeat this process several times until no impurities can be seen in the water;
3. For cleaning of used air filter cores (paper core), if there is no special solvent at hand, only hot water can be used to remove dust and oil stains on the paper core surface;
4. In addition to being dirty, sometimes there will be cracks in the rubber membranes of some air filters that are exposed to sunlight for a long time or exposed to rain for a long time;
5. If there are cracks in the rubber membrane of some air filters that have been exposed to sunlight for a long time or exposed
Repair komatsu excavator throttle lever assembly problem
1. The komatsu excavator throttle lever assembly wallows, so that it cannot be returned to the original position after the full throttle, and the engine speed is idle. One of the reasons for this failure is that the spring and bearing are damaged. When repairing, first check whether there is a problem with the spring and bearing, if there is no problem, then adjust the throttle lever assembly.
2. The komatsu excavator throttle lever assembly cannot be returned to its original position after full load, causing the engine to lose power or overspeed. At this time, first find out whether there is a problem with the clutch assembly of the governor, and then observe whether there is a problem with the throttle lever assembly itself.
3. When the komatsu excavator throttle lever assembly rotates from high speed to low speed, it will cause mechanical vibration. In this case, there may be problems with some parts of the machine and need to be checked in detail by professionals.
Remove the komatsu excavator cover from the governor assembly
The Gear Governor on the Komatsu excavator is designed to prevent the engine from idling too slowly or stalling. The governor is a spring-loaded assembly with a number of weights attached to it. The weights rotate at high speed, and centrifugal force causes the weights to move outward against the springs. This action increases fuel injection proportionally, resulting in increased engine speed. Removing the cover from the governor assembly allows you to clean the governor, inspect parts and make modifications to increase engine performance.
Remove the large bolt in the center of the governor using a socket wrench and remove the retainer spring. Lift up on the large weight and remove it from behind the retainer spring. Remove all three of these items together as one unit and set them aside.
Remove all eight of the bolts from around the outside edge of the governor cover using a socket wrench with an extension, then lift up on the cover slightly to separate it from its housing. You might need to tap up on it with a rubber mallet to get it loose if rust has formed between them.
Check the komatsu excavator spring tension on the governor assembly spring
The spring tension of the governor assembly is important in maintaining shift quality. If it is too tight, the vehicle may not downshift at proper speed or RPM. If it is too loose, the vehicle will downshift at too low a speed. The proper setting of spring tension will be found by performing a road test and adjusting accordingly until desired shift characteristics are obtained.
1. Place the vehicle in neutral.
2. Start and run engine for at least 30 seconds.
3. Depress accelerator pedal to the floor and hold for at least 10 seconds, then release pedal slowly. This will release any vacuum pressure in the modulator and hydraulic lines and allow transmission fluid to fill the converter and hydraulic lines.
4. Place vehicle in drive and perform a road test in city traffic with minimal stop and go conditions (no more than two stops during an approximate five minute period). Road speed should be between 15 and 20 miles per hour with torque converter locked up as much as possible to reduce slippage during shifting. While driving, listen for transmission noises, such as chatter or grinding when upshifting or downsh.
Repair komatsu excavator throttle cable connection problem
This is a problem with the original design of this machine. After disassembling, you will find that the cable wire sheath is worn out by itself. The reason for this design is to prevent the cable from being pulled and broken when the driver operates. But after a long time of use, the effect is not very obvious.
After disassembly, we found the cause of the malfunction. This picture is the upper part of our throttle cable. The blue part is the core connected to our accelerator pedal on our steering wheel, and there are two white things on both sides, which are called fasteners. It was originally used to fix our cables to prevent them from being pulled off and broken! But it has been used for so many years, don’t talk about being fixed, and it was broken in half!
We have tried many solutions before and have not been able to solve it completely until we finally had an idea. We have bought a special buckle for fixing cables. It looks like this in figure 2, but its length is much longer than our original one! So when we installed it, we could only install one at a time!